
OUR WORK PROCESS.
step by step
SW16
Streatham | landscaping
The customer call
We've received a call from a family living in New Cross whose garden needed a full transformation, as it has been neglected for quite some time.
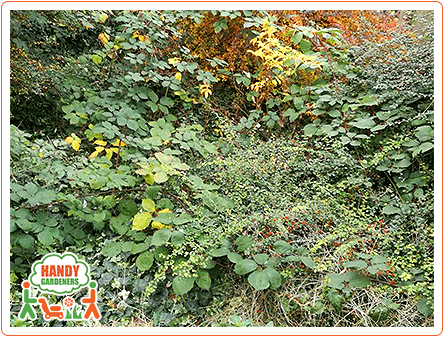
before
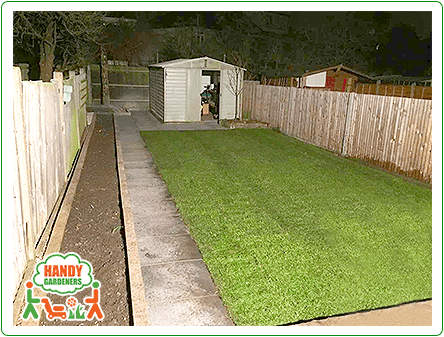
after
The garden is one of the most beautiful places a house could share with its guests! If you're one of the luckiest persons on Earth who can enjoy daily a wonderful oasis as part of your property, then it means you've found us. Just like our last happy customers who were extremely happy with how we landscaped their garden in Streatham, London.
Information about the job
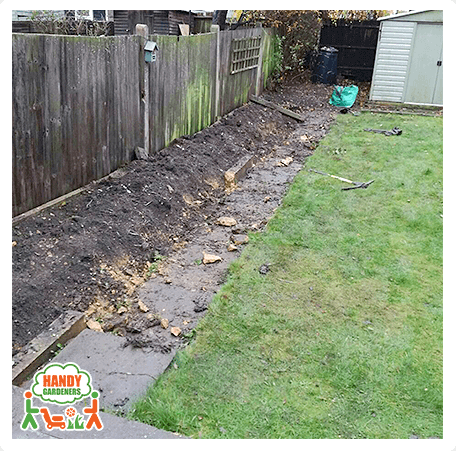
One of our latest garden makeover projects was related to fully transform a medium-sized back garden part of a home in the SW16 area. When we went for a viewing, we've found it quite unruly with shrubs sprawled around it and flowers bloomed freely in unweeded borders, as you can see here:
Back gardens, though, are invariably different and much more private and personal. So, our plan was to turn our clients' London garden into their own, delightful heaven, as we believed we managed to do, after we've landscaped it:

The plan and preparation
The first and most important element in planning the garden of your dreams, no matter how small or large it is, is deciding what to leave out and what to keep. Hence, our first step was to have a discussion with the owners regarding the garden they envision, so we could work around their ideas and requests while advising them on what would work best for their garden.
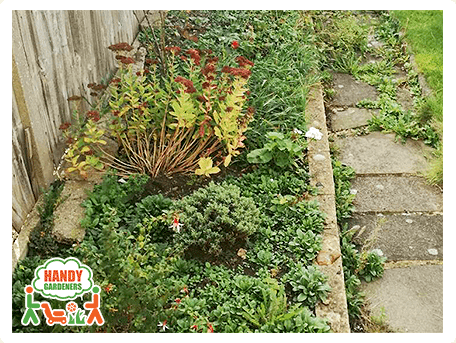
Then, we created a visual walkthrough of how the new garden would look like after we are done with its makeover and mapped out the jobs it would take for that garden in Streatham to be landscaped:
It took over 3 days for our professional team of landscapers to complete this landscaping project.
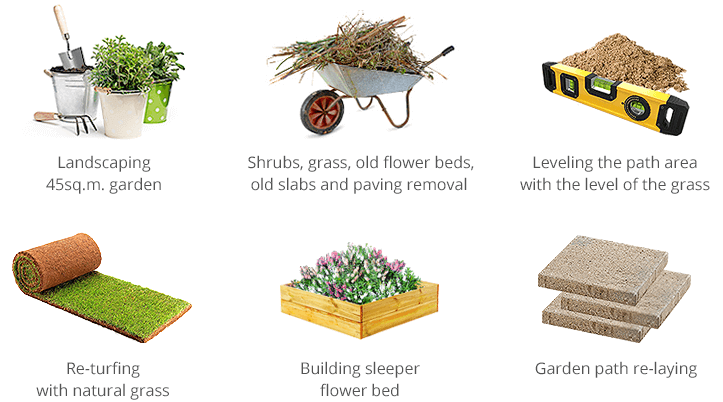
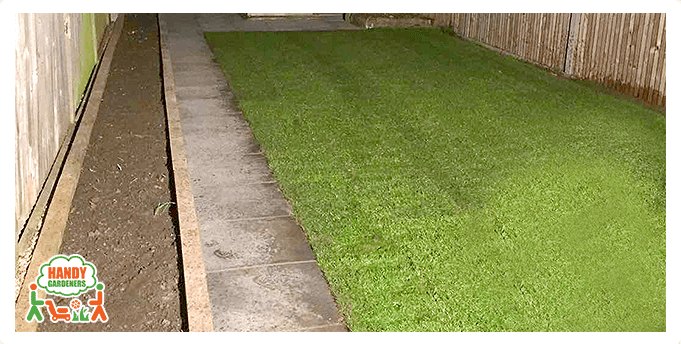
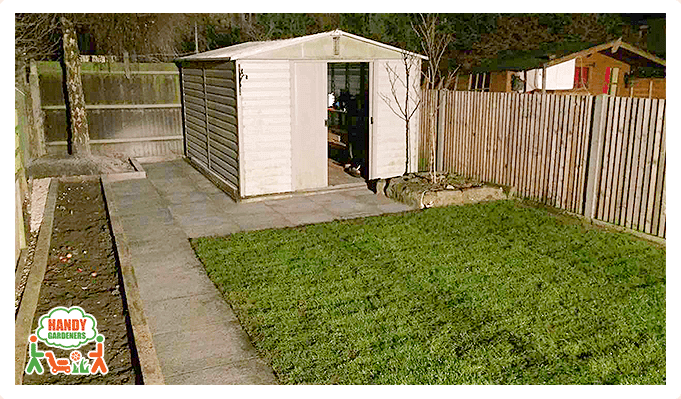
Step 1. The start was set by dividing the garden into three different smaller areas by our top landscape architect. Such division of the garden into smaller spaces was performed with the intention of creating inviting outdoor area that gives the opportunity for varied planting of colours and their artistic combination. No garden is too small to be divided into smaller areas as long as each of them harmonises with the whole. So the first separate space was the sleeper, situated along the left side of the garden, the second was the lawn area and the third one - the paved area.
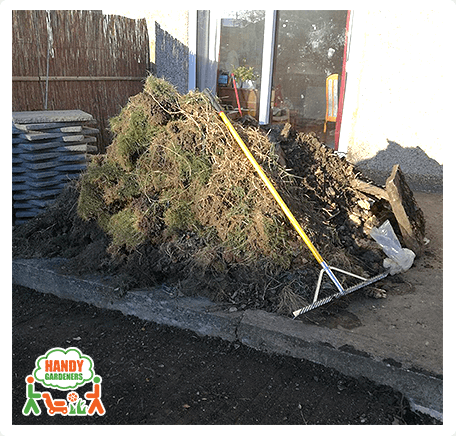
Step 2. Secondly, we knuckled down to vigorously clear the garden from all the vegetation there, leaving only one tree. Then, we continued with removing the old paving and slabs. Our landscapers, even though very experienced ones, found it very difficult to remove the old slabs because they were cemented blogs rather than slabs. After everything was collected and the whole garden area was cleared out from all the rubbish, we could continue with undertaking the next steps of the landscaping project.
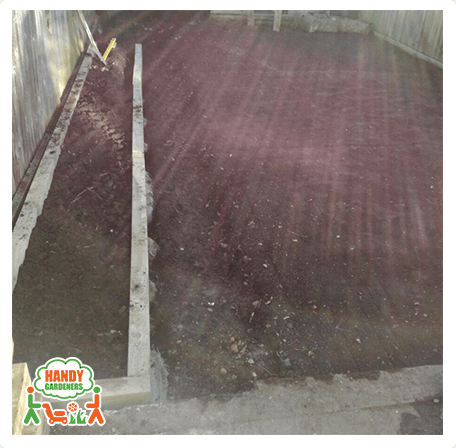
Step 3. Once everything was cleared, the area needed to be lifted up a little bit and leveled out, so it reached the same level as the level of the grass. It turned out that we needed it to combine cement with sand in order to achieve the required leveling of the area that were to be paved, as preceding the next step of the process.
Step 4. Laying new natural turf was the next major step of the landscaping process. We use high quality natural green grass which gives you the sense of freshness and make you feel as if you are somewhere in the forest. However, the toughest part was to remove the old grass and to expand the area on the left side. The process continued with leveling the area and removing any stones, so the ground was made absolutely even. Of course, some areas need fertilizers and minerals to be applied in order to enrich the soil, but in this garden, we didn't need them. Top soil was applied and re-leveled again. The final step was laying the fresh natural grass while making sure there are no spaces between the grass squares.
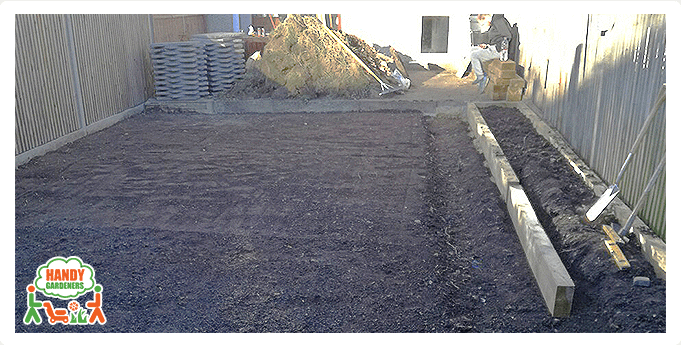
Step 5. Building sleeper flower beds that stretches along the entire left side of the garden was the next step we had to undertake. After we had discussed it with the clients, they had chosen their flower bed borders to be built from wooden materials. Using wood for creating garden borders is often preferred option because it is one of the easiest ways to create defined displays, add character and keep your garden looking tidy all year long. The final step of the creating of the wooden borders was filling up the area with top soil and preparing it for planting the flowers and plants selected by the clients.
Step 6. The last division of the a garden was creating a paved path which separates the sleepers from the grass area and connects the house with the garden shed. Garden path re-laying was done after removing all the old and broken slabs and laying down slabs chosen by the client. However, we couldn't afford using wet cement because of the heaviness of the slabs.
The Final Look
All of this was completed within 3 days of hard work and long hours. Our seasoned landscapers have been landscaping the garden until late in the evenings during these three days but were determined to deliver perfectly finished garden, as they did at the end:
Landscaping
starting from £96


 Get a Quote